Summary: in this tutorial, you’ll learn how to create the Flutter Hello World application. The goal is to help you get started with Flutter quickly and understand the Flutter app structure.
Install flutter #
To develop Flutter applications, you can use Windows, macOS, Linux, or Chrome OS. And you can select the platform on which you’re about to install Flutter by following the instructions on this Install Flutter page.
Set up an editor #
Flutter allows you to build apps with any text editor combined with Flutter’s command line tools. However, you’ll be more productive using your preferred editors with plugins.
The arguably popular editor for developing flutters are Visual Studio Code, Android Studio, IntelliJ, and Emacs IDE. To install one of these editors with Flutter plugins, you can follow the instructions on this page.
Create your first Flutter app #
We’ll use Android Studio to create the first Flutter application on Windows.
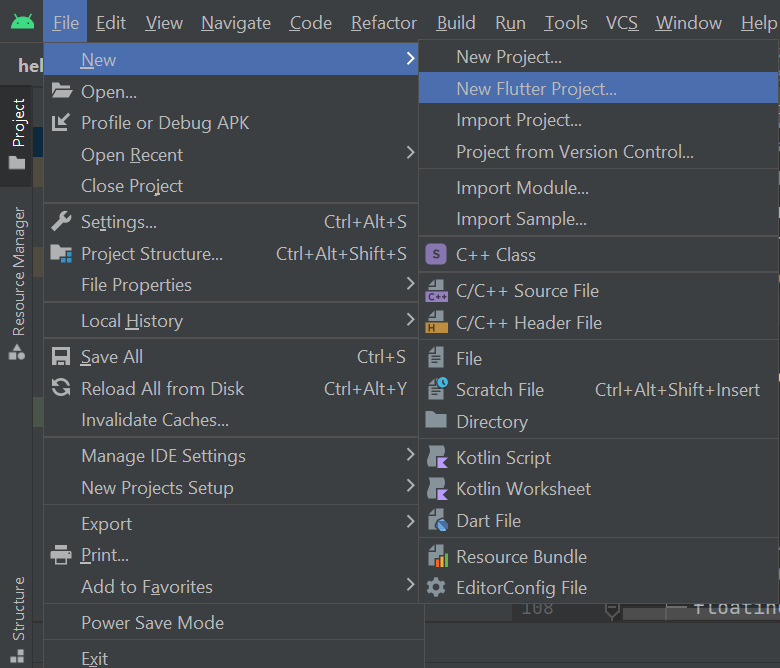
First, create a new flutter project by selecting File > New > New Flutter Project…:
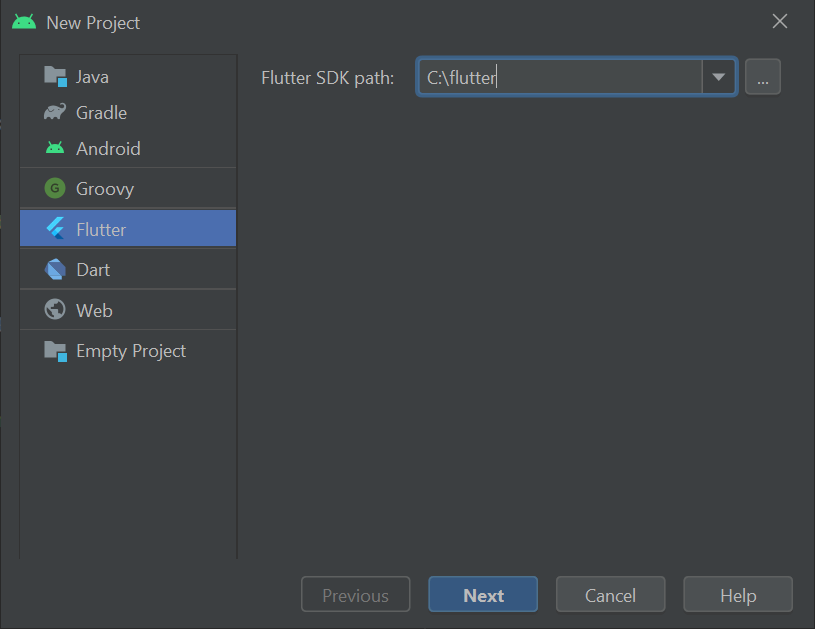
Next, select the Flutter SDK path e.g., C:\flutter, and click the Next button:
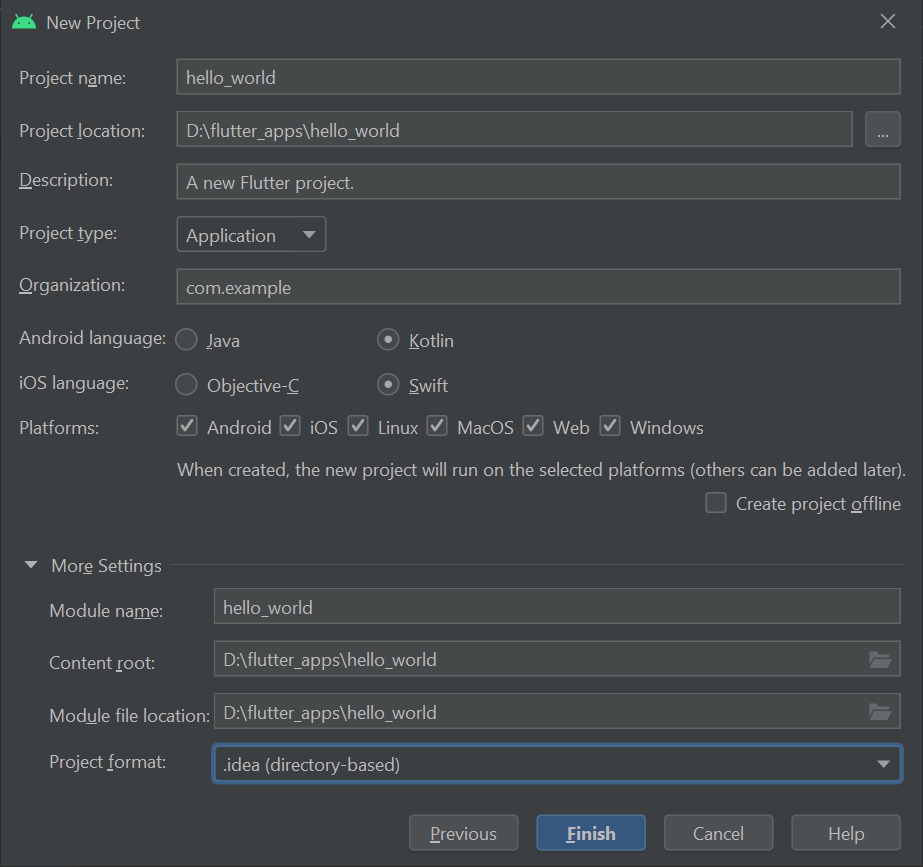
Then, enter the hello_world in the Project name and the directory that stores the project in the Project location e.g., D:\flutter_apps\hello_world:
By default, flutter creates a starting application with the code located in the libs/main.dart file.
After that, launch the simulator by selecting Tools > Device Manager and selecting a simulator of your choice.
Finally, run the app by selecting the Run > Run ‘main.dart’ file from the top menu or clicking the Run button from the toolbar of the Android Studio.
The following picture shows the Flutter demo app:
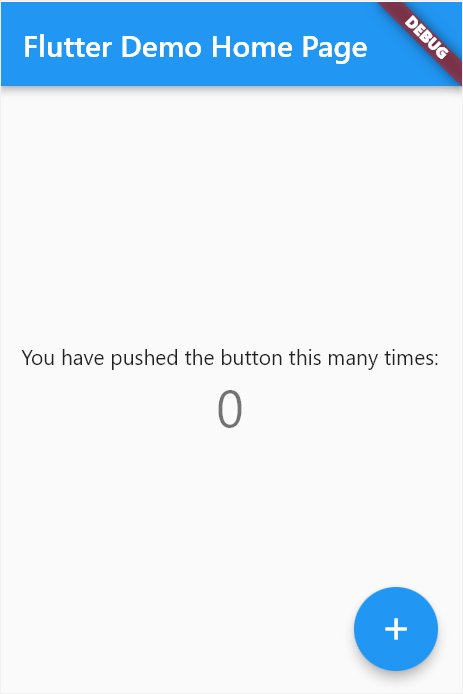
If you click the Increment button, you’ll see the number is increased by one.

Hot reload #
To experience the hot reload, you can change the text in the main.dart file from:
'You have pushed the button this many times:'Code language: JavaScript (javascript)to something you like:
'You have tapped the button:'Code language: JavaScript (javascript)Once you save the changes, you’ll see that it is instantly reflected in the app:

Besides carrying a hot reload, you can also perform a hot restart. A hot restart takes more time than a hot reload because it resets the state of the application.
For example, if the current number is one and you change the text and perform a hot reload the number will be still one because the state of the app is preserved.
However, if you change the text and perform a hot restart, the number will be reset to its initial state which is zero.
On Android Studio, you can perform a hot reload or a hot restart by clicking the Host Reload or Hot Restart button:

Create the Flutter Hello World App #
First, replace all the code in the main.dart file by the following code:
import 'package:flutter/material.dart';

void main() {
  runApp(const HelloWorldApp());
}

class HelloWorldApp extends StatelessWidget {
  const HelloWorldApp({Key? key}) : super(key: key);

  @override
  Widget build(BuildContext context) {
    return MaterialApp(
      home: Scaffold(
        appBar: AppBar(
          title: const Text('Hello World App'),
        ),
        body : const Center(
            child: Text('Hello, World!!!'),
          ),
        )
      );
  }
}
Code language: Dart (dart)
Second, run the program and you’ll see the following app:
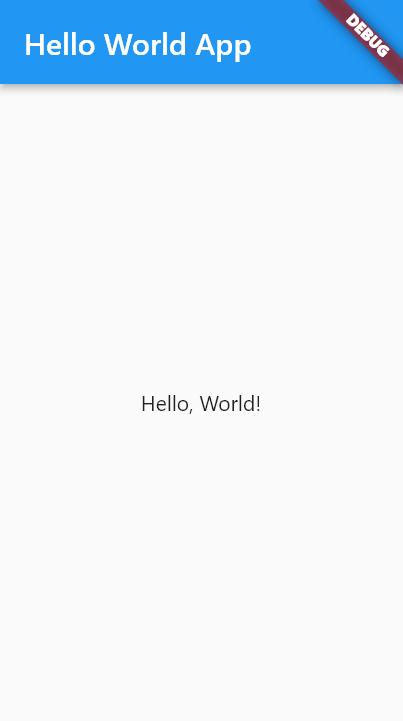
How it works.
First, import the material package:
import 'package:flutter/material.dart';Code language: Dart (dart)Second, define the main() function:
void main() {
  runApp(const HelloWorldApp());
}Code language: Dart (dart)
A flutter always starts with the main() function. Inside the main function, we call the runApp() function that accepts an instance of a widget. In this example, we create an instance of the HelloWorldApp widget.
Third, define HelloWorldApp class that inherits from the StatelessWidget class:
class HelloWorldApp extends StatelessWidget {
  const HelloWorldApp({Key? key}) : super(key: key);

  @override
  Widget build(BuildContext context) {
    return MaterialApp(
      home: Scaffold(
        appBar: AppBar(
          title: const Text('Hello World App'),
        ),
        body : const SafeArea(
          child:  Center(
              child: Text('Hello, World!'),
            ),
        ),
        )
      );
  }
}
Code language: Dart (dart)
Everything in Flutter is a widget. Flutter has two kinds of widgets stateless and stateful widgets.
In the simplest terms, if your widget doesn’t change while the app is running, it is a stateless widget. On the other hand, if a widget has a state that is changed during the app’s execution, it is a stateful widget.
The HelloWorldApp has the build() method that constructs the widgets for the app. It returns the MaterialApp widget as the root widget. In turn, the MaterialApp widget contains its child widgets and so on. Therefore, a Flutter app typically contains a widget tree:
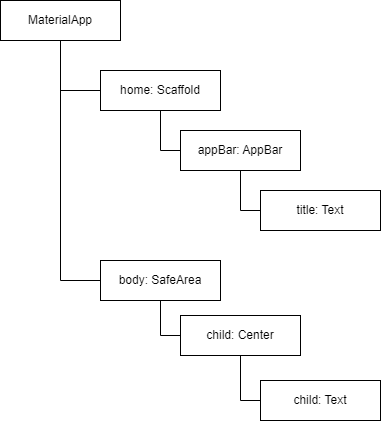
The following is a summary of the widgets of the Flutter Hello World app:
MaterialAppwidget is the starting widget of the app. It contains Material components and follows the Material Design.Scaffoldwidget is a single top-level container of aMaterialAppwidget. It provides many basic functionalities likeAppBarandNavigation.- The
AppBarwidget displays a top bar of the app. It shows the title by using aTextwidget. - The
bodyof theMaterialAppwidget has aSafeAreawidget that prevents its child widgets from overlapping unsafe areas. - The
Centerwidget aligns its child widget which is theTextwidget to the center of the body of the app.
Summary #
- Everything in Flutter is a widget.
- Use the
MaterialAppwidget to create an app that follows the Material design. - Use the
AppBarwidget to display an app bar. - Use the
Scaffoldwidget to set up the basic functionality of the Material app. - Use the
SafeAreawidget to prevent the app from overlapping an unsafe area. - Use the
Centerwidget to align another widget to the center. - Use the
Textwidget to display a text string.